
Objective:
You wish to understand the various access methods for an event. This access control can be directly configured in the cockpit. It provides 3 methods:
1. Free access - When selected, the event will be publicly accessible to everyone with the link. Anyone who clicks on the "Join event now" button on the event will be able to join
2. Password protected - Admin will specify a common password for all attendees. When a user clicks on the "Join event now" button, they will be prompted to enter the password.
3. Guestlist - To have full control over who can access the event, this option can be chosen and configured. Upon logging in, each guest will receive a unique access link via email and can then log in to the event.
Note: Access links will be specific to each email and hence should not be shared with others. Only one user can be online with the same link at the same time.
Step by step guide:
In cockpit > under the event panel on the left side > choose Access control
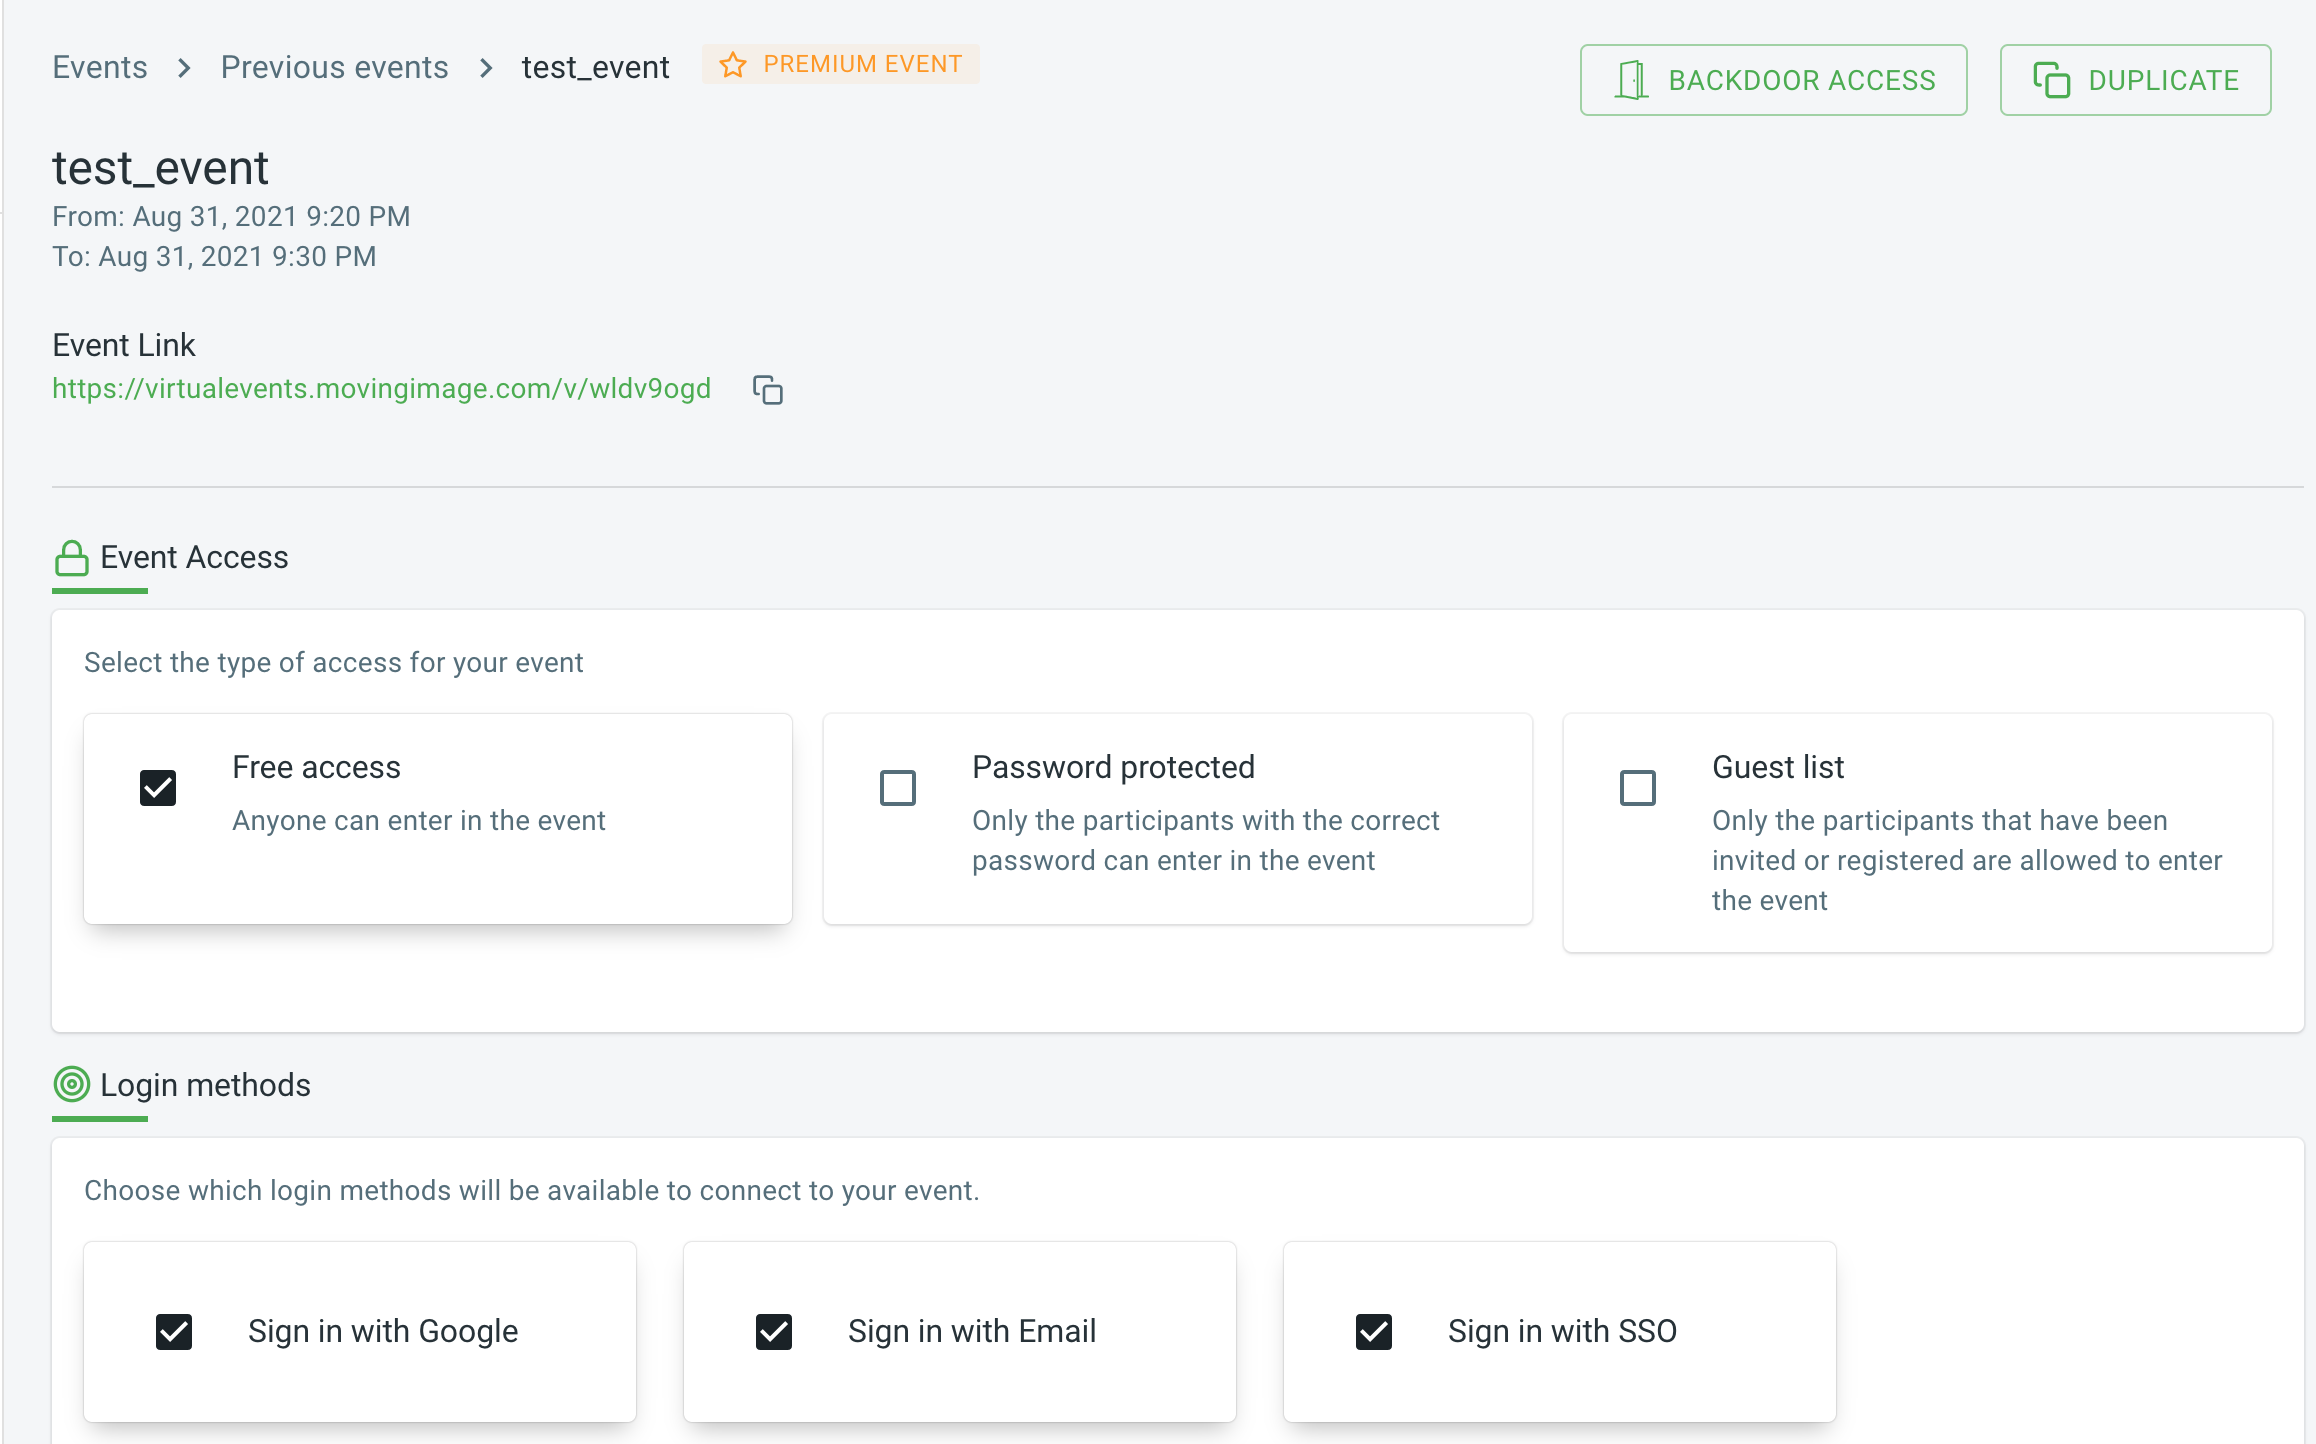
2. For Free access - check the corresponding option
3. For Password protected - check the option and choose the password under the "Password protected" tab 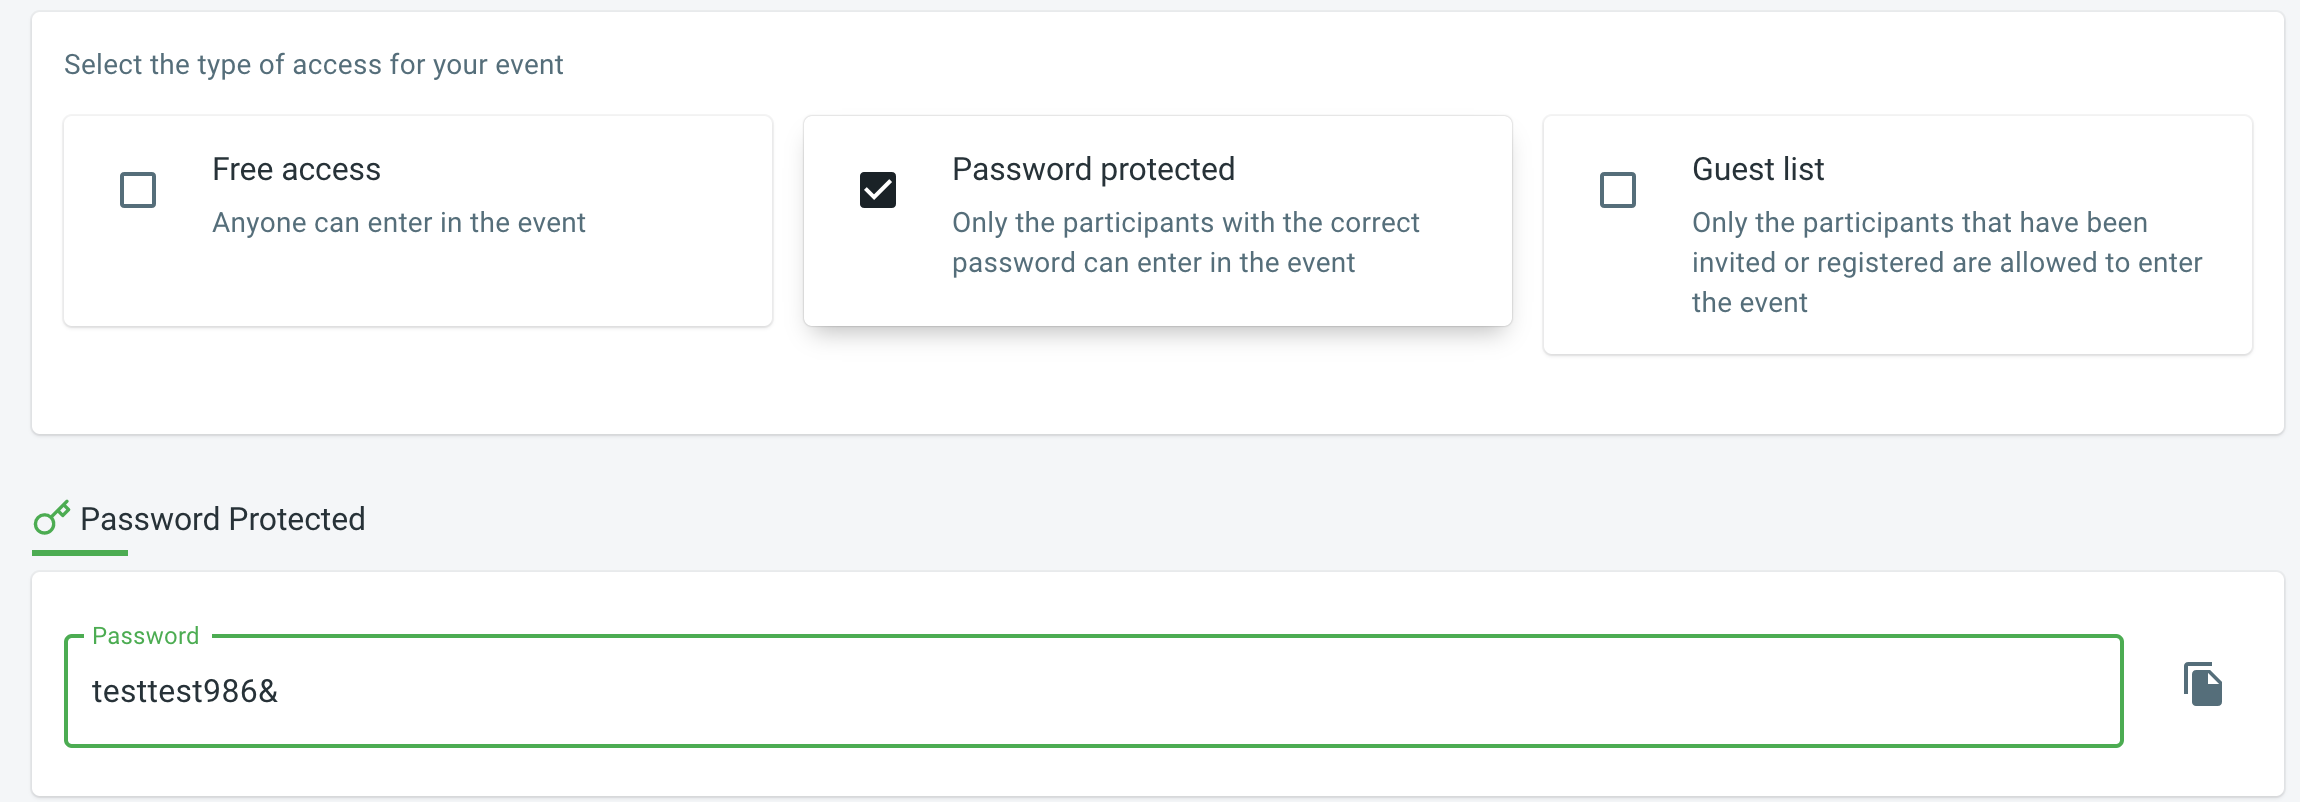
4. For Guest List - additional fields like RSVP and Guest List needs to be setup
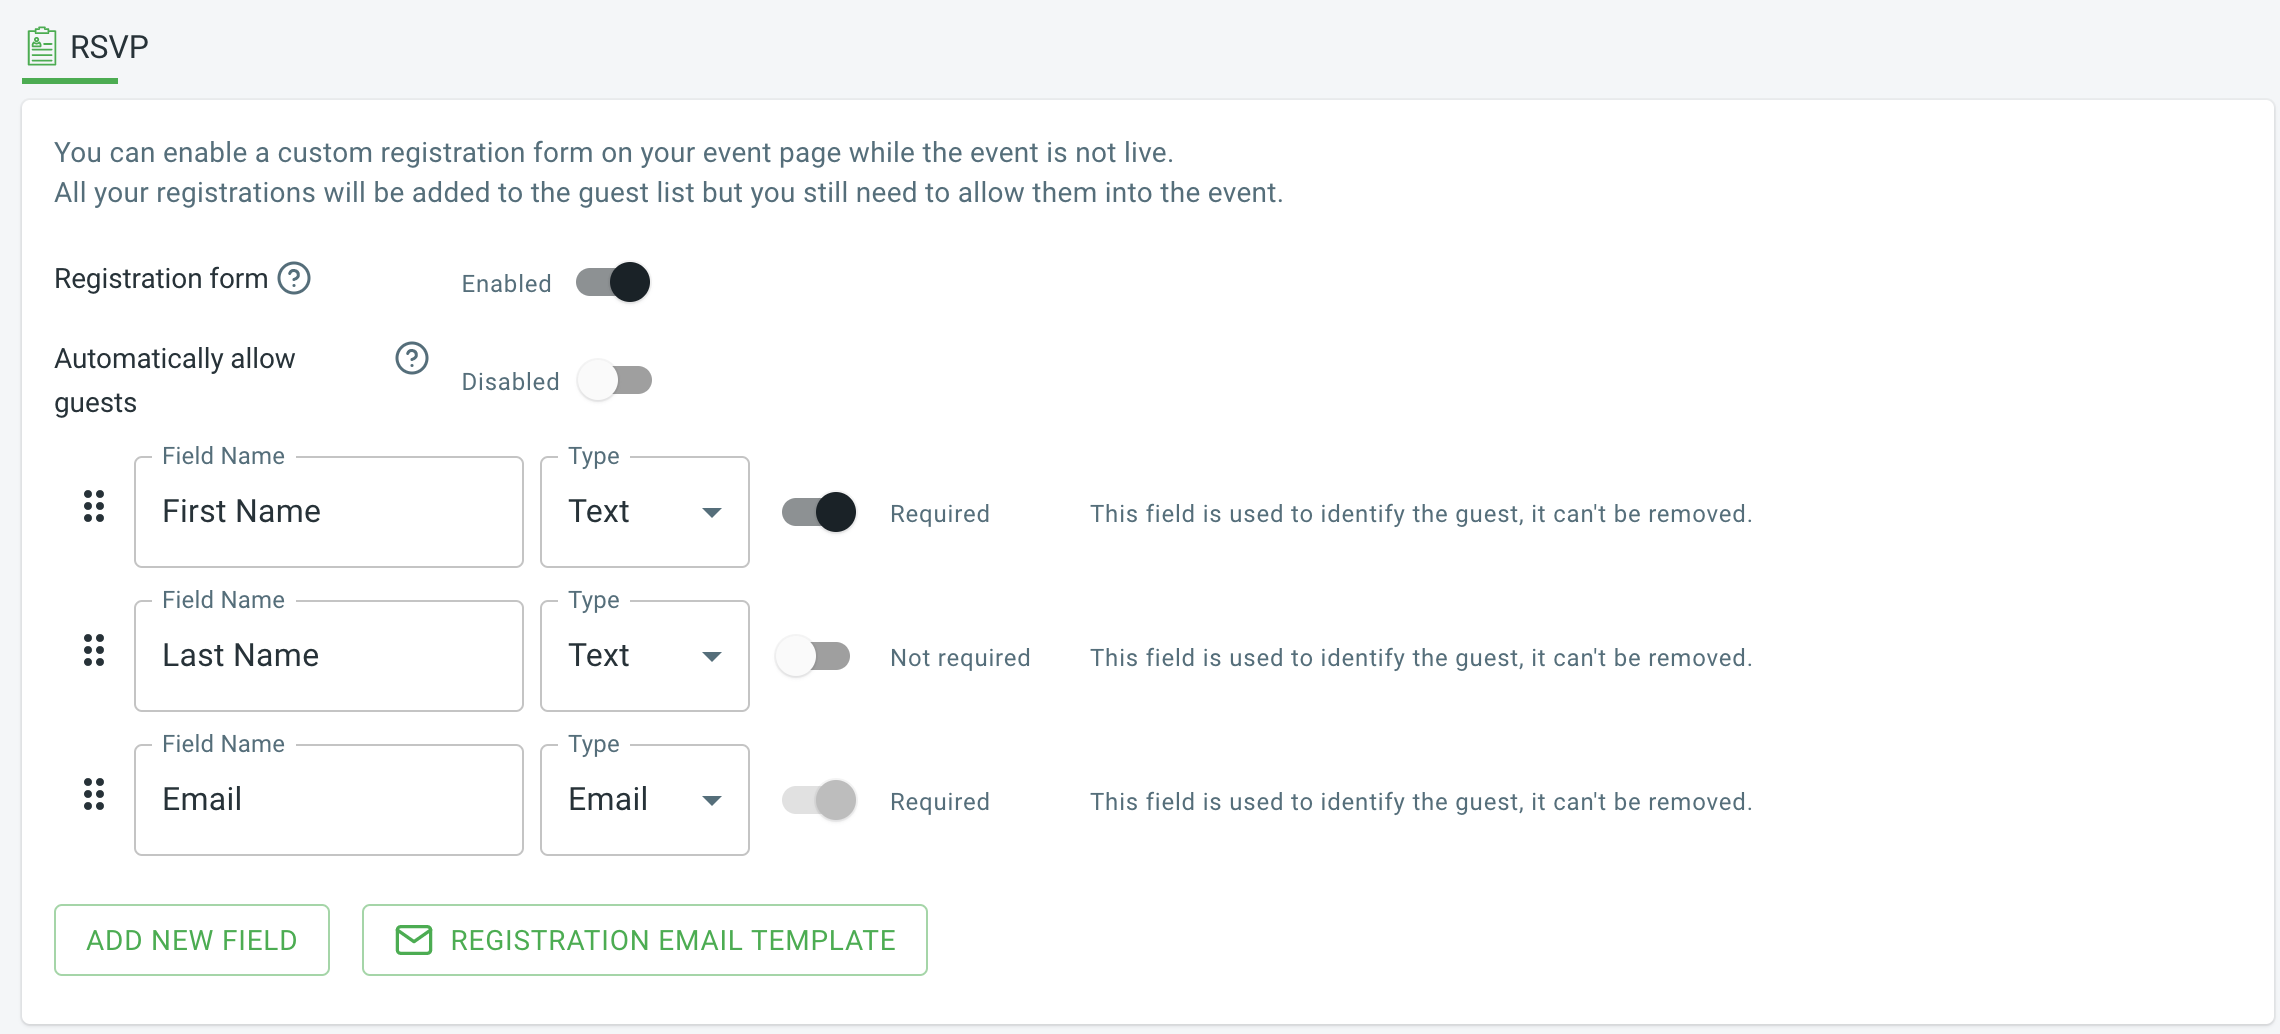
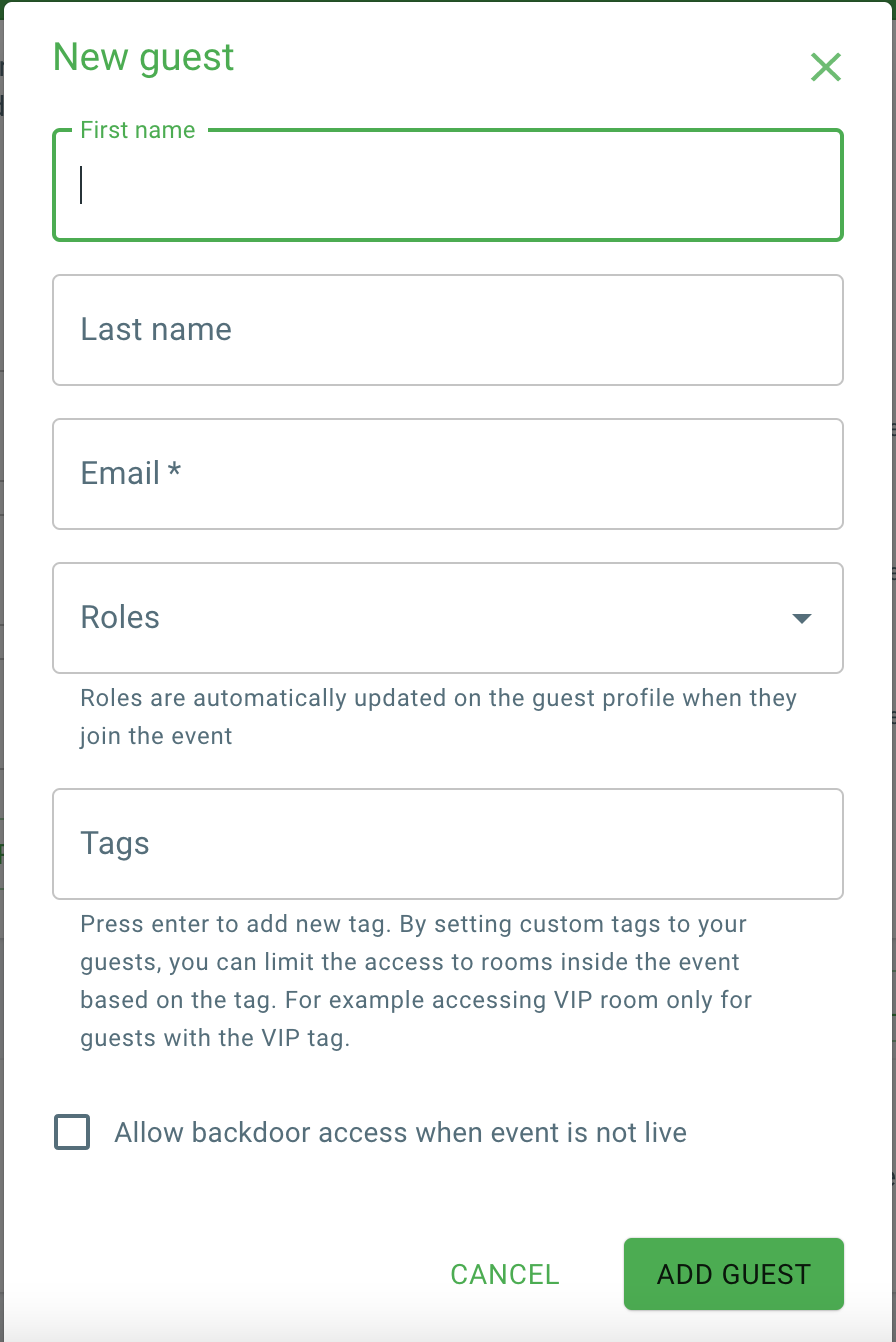
Guest List - there are 3 options to add the guest lists
- Invitation using the email template
- Importing a guest list using a .csv file (You can import a .csv file with the list of guests you want to give access to this event. On the first line of your .csv file, add the names of the columns. The possible columns are first name, last name, email, backdoor access ("Yes" or "No"), roles ("host" or "speaker" separated by ;), and tags (separated by ;). The delimiter of the .csv file should be a comma (,) .)
- New guest list - manually adding the guests with the name, email, and role details
Note :
Password-protected and guest lists can be enabled at the same time.
Comments
0 comments
Please sign in to leave a comment.