
Requirements
- Have access to the events cockpit (administration area)
Objective
You may wish to create a room within your event, which is accessible only to some specific users.
Step-by-step guide:
1 - Assign the tag to the restricted room
- Create a room and set all specific settings you wish to apply to this room. Go to our documentation to discover how to create a room and what settings are available. (NOTE If the room you wish to restrict the access to already exists, you can skip this step).
- Right-click on the room you wish to restrict the access to and select edit.
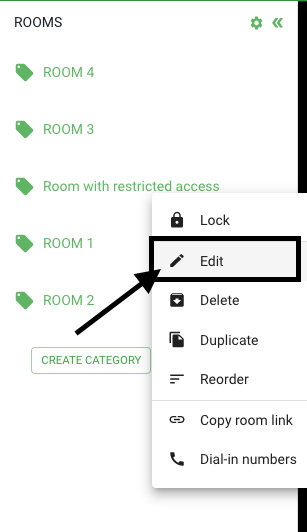
- On the left navigation bar, select "configuration"
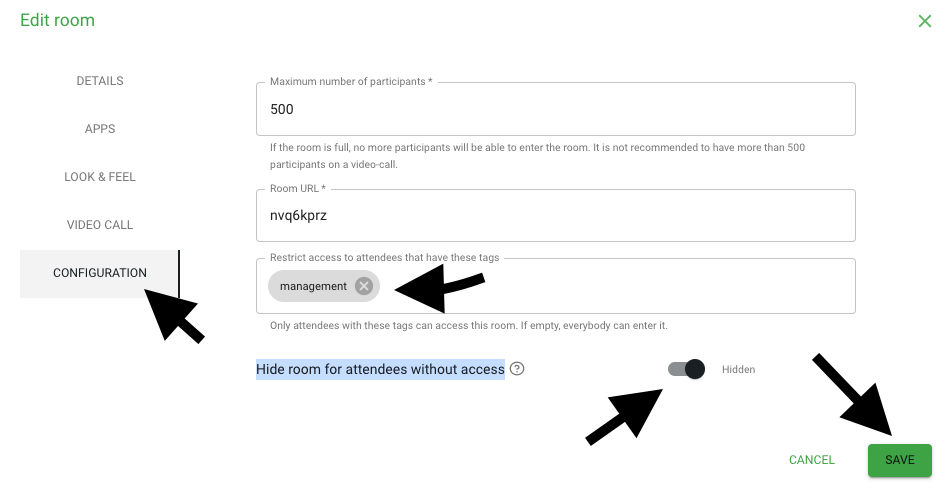
- On "Restrict access to attendees that have these tags", insert the tag that the users should have in order to be able to access the room (e.g. support-team, sales, etc.). NOTE You may also add more than one tag if you wish that the room is accessible by two different categories of users (e.g. two different teams). The user has to have at least one of the set tags to access the room.
- If you wish that the room not only is not accessible for all other users that do not have the tag but also that it is not visible, toggle "Hide room for attendees without access".
- Click on the "Save" button.
2 - Assign the tag to the users, who should have access to the room
You have two options to assign the tag to the users, who should have access to the room. From the cockpit and from the event itself.
OPTION 1 - From the event
In case the event is free to access or password-protected (no guest-list), you can add the tag to the participants directly from the event.
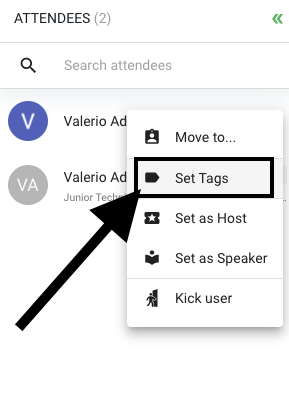
- On the left navigation menu, click on "attendees"
- Right-click on the attendee to which you want to give the access
- Select "set tags"
- Type-in the tag, or to avoid misspelling just select the corresponding tag for the room from the drop-down options.
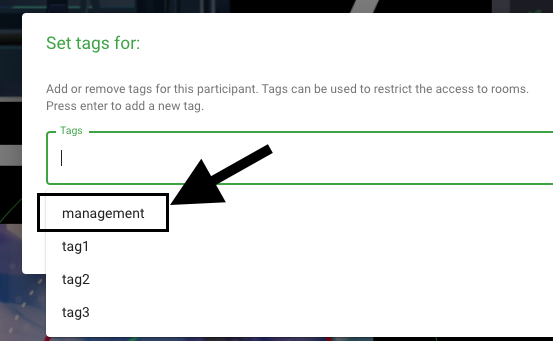
- Click on the "Save" button or press on enter.
OPTION 2 - From the cockpit
If your event has a guest list, you can also assign tags to the customers, directly by inviting them.
- Go to the cockpit of the event
- On the left menu, select "Access Control"
- If the event has "Guest List" has access Control, you will see on the bottom the guest list
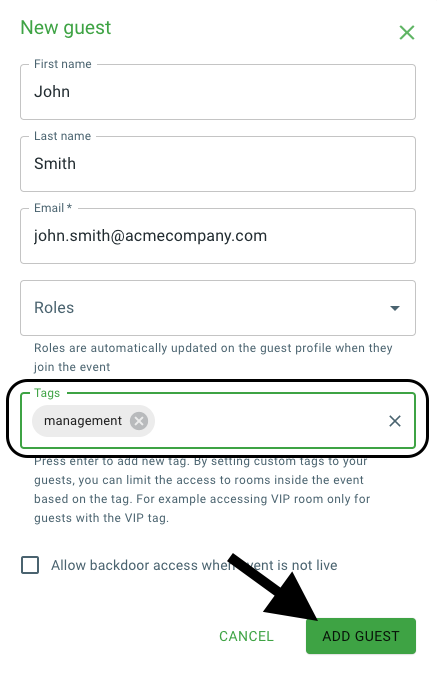
- If the user to which you wish to assign the tag is not in the guest list, click on "+ NEW GUEST" button
- Add the tag in the "New Guest" pop-up window
- Click on the "Add Guest" button
- If the user was already on the guest list, just click on the corresponding edit icon

- Add the tag
- Click on the "save guest" button
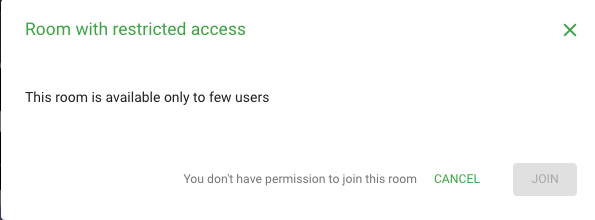
Now, only the attendees, who have the tag set for the room in step 1 (or at least one tag) can access the room. If the room is not hidden to attendees with no access, when a user without access tries to enter the room, they will be informed that they do not have access.
Comments
0 comments
Article is closed for comments.