
Requirements
- Access to the Virtual Event's cockpit
Objective
When creating a new event, instead of manually adding room categories via the UI, you can import room categories by uploading a .csv file. This is particularly useful when the event contains many categories.
You can also export a .csv from an existing event, without making changes, and easily import it to a new one. Doing this will help you if you are organizing a series of virtual events with the same/similar categories, or to add many categories easily at the same time.
Step-by-step guide - How to create and import a .csv for room categories from scratch
Step 1 - Create the .csv file for room categories
First of all, you will need to create a comma seperated values file (CSV). This file will need to adhering to the following pattern:
title, category url, background image url, gradient color (#hex), text color (#hex), hide title (true/false),enabled (true/false), and allow room creation by attendees (true/false).
- Open a .csv or text editor (e.g. Microsoft Excel)
- Copy and paste in your first row the following text (field headers):
Title,Category URL,Background Image URL,Gradient Color,Text Color,Hide Title,Enabled,Allow Room Creation By Attendees |
- Every subsequent row will need to follow the same order and separate all information with a comma (,).
Additional Info on the Room Category fields set up
| title | Compulsory | The title of the category (which can be shown or hidden) |
| category url | Compulsory | Final URL part, the user sees on the category |
| Background Image URL | Optional | You can choose to add a background image, shown on the category list. Insert the URL of the image. |
| Gradient Color | Optional | You can add a gradient color to the background image (defaults to white) |
| Text Color | Optional | You can set up a specific #HEX color for the text (defaults to white). |
| Hide Title | Optional | TRUE if you want the category title to be hidden (defaults to False) |
| Enabled | Optional | TRUE if you want the category to be available and visible to the end-user (defaults to False) |
| Allow Room Creation By Attendees | Optional | TRUE if you want attendees to be able to create rooms within the category (defaults to False) |
e.g.
Category 1,category_1,https://images.pexels.com/photos/3560168/pexels-photo-3560168.jpeg?auto=compress&cs=tinysrgb&dpr=1&fit=crop&h=200&w=280,#917c7c,#7c9a32,FALSE,TRUE,TRUE |
Note:
Only title and category URL are compulsory. If you do not wish to add some optional elements and are happy with the default settings, just leave a blank space between the two commas in the corresponding row.
e.g. your third row could look like this:
Category 3,category_3,0,,,TRUE,,TRUE |
- Save the .csv file (in csv comma separated format).

Step 2 - Import the .csv file for Room Categories
- Log-in to Virtual Events
- Go to the cockpit
- Select the corresponding event
- On the left menu navigation, go to "Operations"
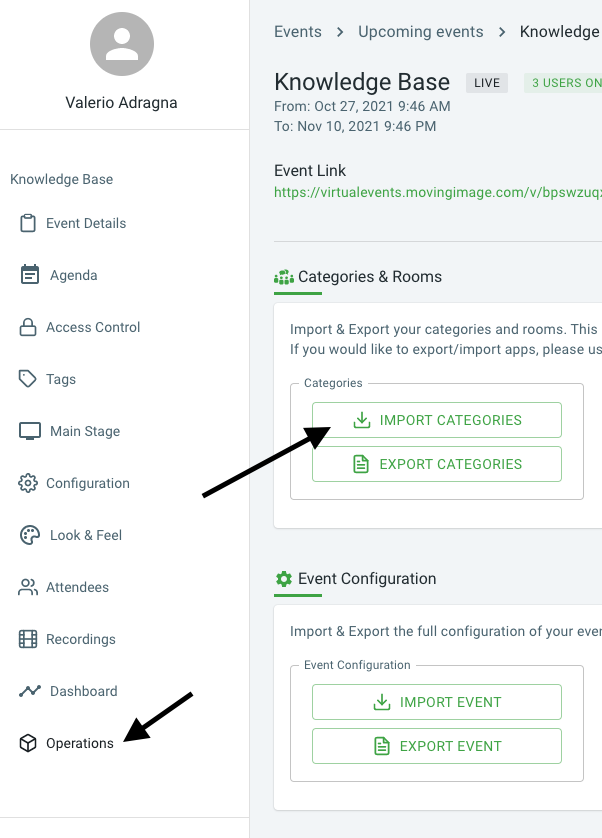
- Click on the import button
- Drag and drop the .csv file you created on the previous step to the dashed area
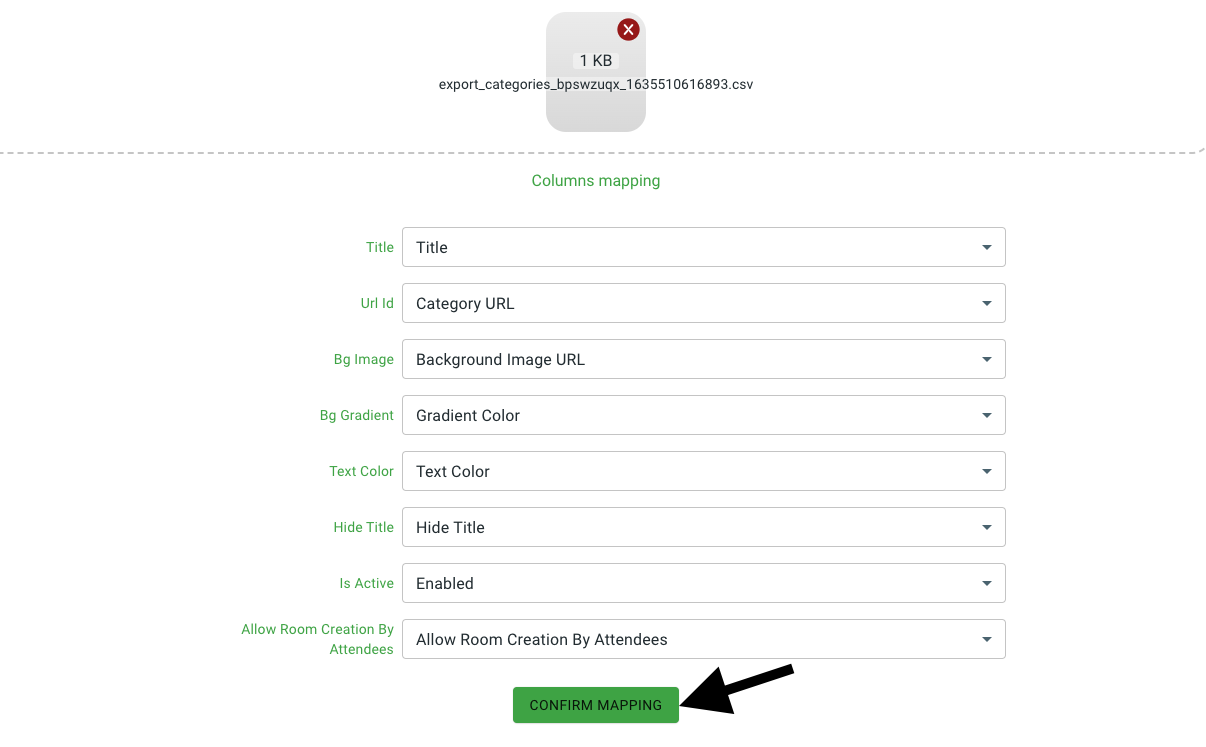
- Check if the mapping is correct and confirm it (if you followed the order in your csv file as in this guide, no changes will be needed).
- You will see a confirmation window with all categories settings. You can pick separately the category you want to add or update (toggle on the last column). You can also see if a category/room already existed (status).
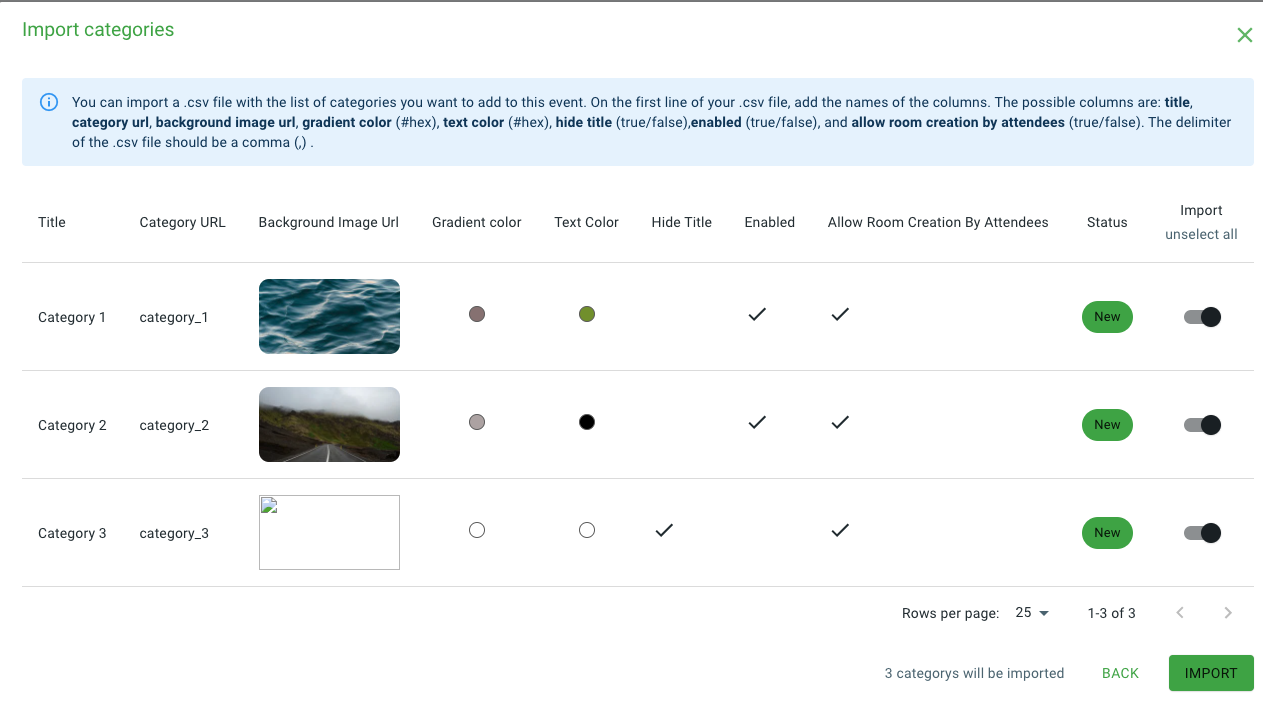
- Confirm by clicking on "import" button
Congratulations, your room categories are now available within the rooms section of your event!
Comments
0 comments
Article is closed for comments.